1 - West Fork to Pe Ell
Linked via: Proximity 79% confidence Synced 6mo ago
Gauge Conditions
Runnable: 500.0 – 3,500.0 CFS
Data from American Whitewater & USGS
Run Map
Run Time Estimate
Select put-in and take-out to estimate time.
Unlock Advanced Trip Planning
See wind-adjusted speed maps, forecast planning, and detailed time estimates.
Sign in to generate an AI timing estimate for this run.
Whitewater timing varies with scouting, portages, and group pace. Use as a planning baseline.
Description
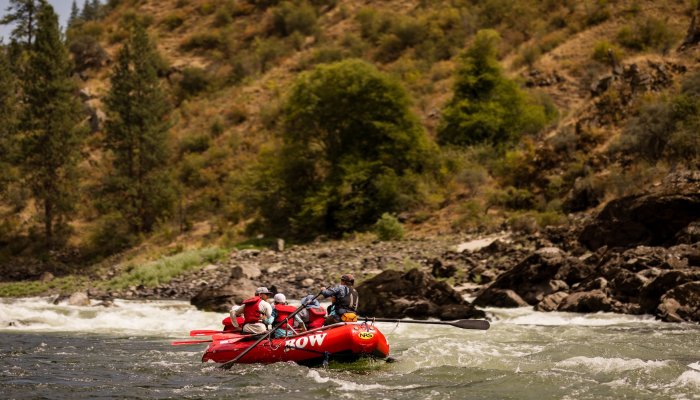
The Chehalis is a little off the beaten path as one of the few whitewater runs in the southwest corner of the state, but it serves up some great whitewater for a wide range of interests. River cruisers who want to get in a good workout can enjoy up to 15 miles of continuous whitewater, intermediate paddlers can find several fun sections with only a couple portages, experts can find a couple very challenging drops, and playboaters can find several fun features. Although the run is plenty of fun at lower levels the middle section moves a little slowly for some. The big drops provide added excitement at higher flows and this run has long been known as a place to check out after a good heavy rain. The scenery on the run can best be described as working forest, with clearcuts dominating the landscape. Despite that the geology is striking and with new riparian forest protection guidelines for the benefit of salmon, the forest along the river is recovering.
The run can be divided into six sections marked by the bridges that cross the river. The river forms at the confluence of the west and east forks, and from this point to the first bridge downstream the river flows at a lazy pace through continuous class II rapids. Unless you are paddling down from the East or West Fork or otherwise looking to add miles to your trip you might want to consider a put-in at the next bridge downstream (mile 9.1 bridge).
With the start of the second section the pace picks up with several class III ledge drops and fairly continuous action. The road will be to river right and closely follows the river here and the section ends as it crosses back to river left (mile 6.9 bridge).
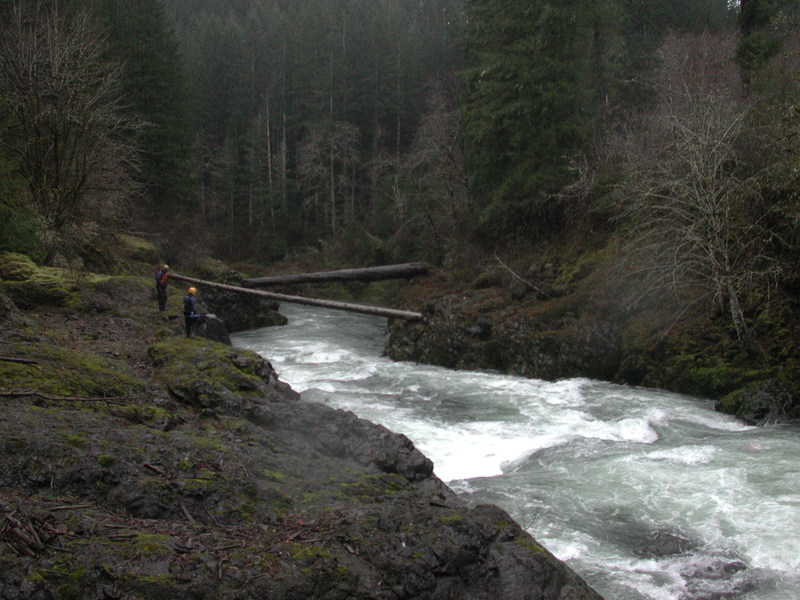
Although the third section starts slowly you will recognize a change in the charcter of the river as you enter the first significant class III+ drop on the run. There are a couple great rapids before you reach the approach to Cape Horn and the entrance to the first gorge. This rapid, also known as Fisk Falls, starts with a series of ledges that build in intensity as the river bends around the corner to the right. Use caution as you approach and don't over commit before scouting as the class III approach leads you in before you quickly realize this IV+ rapid can push class V at certain flows. There is a bedrock bench on river left that provides a good scouting platform and potential portage route. The rapids in this gorge are only a couple hundred yards long and you soon pass out of the canyon after crossing under another bridge to enter the fourth section (mile 4.3 bridge).
The pace of the fourth and fifth section move a bit more slowly but still providegood continuous class II/III rapids with a number of ledge drops and several fun waves. If flows are lower than 1000 cfs and especially if you are getting a late start you might want to think about doing half the run and finding an appropriate access along this section. At flows above 2000 cfs this section moves along at a good pace.
The sixth and final section begins at the bridge where you zeroed your odometer after entering the McDonald Tree Farm. This section contains the most challenging drops on the run. After one class III+ rapid you'll soon be at the covered bridge rapid that starts just upstream of the now abandoned bridge. This class IV is a tricky one to scout from river level but a good chute down river left provides a flume ride through the chaotic hydraulics below. The Covered Bridge rapid marks the first rapid at the start of the Lower Gorge and you'll find four additional great class IV rapids awaiting downstream. Shortly after crossing under the bridge, the second drop curves around to the right and has a good wave at the bottom. After a short pool the next rapid provides a fun S turn ride over a ledge and requires you to weave your way around a couple holes. Another short pool and horizon line marks the fourth big rapid with a fast tongue that skirts the base of a wall along river left. After a short recovery stretch the river then plunges over the last big drop of this section as it disappears to river right between two large boulders. You'll probably want to scout the hole at the base of this drop by pulling out for a look from river right. If you don't like the looks of it thereis a decent portage option on the right.
Once you navigate this final big drop the river continues with a couple more easy rapids and more scenic bedrock gorge, but you'll soon pass under a railroad bridge and leave the tree farm as you start to see homes along the river. In a short distance you'll come to the take-out bridge.
Logistics:
From I-5 exit 77 head 20 miles west on Highway 6 to Pe Ell. As you enter town the highway turns right on 4th Avenue. To reach the take-out continue on 0.3 miles from this turn tothe bridge across the Chehalis just outside of town at Highway 6 mile 28. You will find limited parking on river left and a rough trail that leads down to the river.
To reach the put-in head back into town and turn right on 3rd Street. Follow this road out of town. At 0.8 miles bear left and at 1.3 miles bear right to the Weyerhaeuser timberyard. As you pass the yard you'll be entering the McDonald Tree Farm (for the past several years access has been closed to access by a gate). As you enter the tree farm you will catch glimpses of the longest gorge section on the run including the covered bridge. In 2.6 miles from town you will reach the first bridge across the Chehalis. Zero your odometer and from this point you will cross 4 more bridges over the Chehalis at mile 1.1, 4.3, 6.9, and 9.1 before you reach the confluence of the East and West Forks at mile 9.9. The confluence is clearly visible from the road and at this point the 3000 road turns off to the left, crossing the West Fork and headingup along the East Fork, while the 1000 road continues straight up along the river left side of the. As you drive the shuttle, avoid roads that turn away from the river and stay on the main line that parrallels the river and allows you to road scout nearly the entire run.
Unless you are planning a long day that includes a run on the East or West Fork, the bridge at mile 9.1 is a good access for a put-in. The bridge at mile 6.9 would shorten the run a bit more. You also might want to take a look at Cape Horn on the shuttle. As you cross the bridge at mile 4.3 you will be looking upstream towards a bedrock gorge. Continuing on a short distance as the road parallels river left you should see obvious whitewater down in the gorge.
Difficulty
Class III-IV
Length
13.8 mi
Gradient
42 ft/mi
Rapids
3
Access Points
Difficulty Classes
I Easy
II Novice
III Intermediate
IV Advanced
V Expert/Extreme
VI Unrunnable
Current Conditions
5-Day Forecast
Whitewater data from
American Whitewater
American Whitewater